Song of The Wind - Cello Performance Tips
Hopefully you have already seen the Song of The Wind Preview Technique lesson and Practice Tips lesson. Now you are ready to play along with the full tune and start polishing the performance. Don’t just learn these pieces — learn to perform! Whether you realize it or not, YOU ARE A PERFORMER! This cello journey was never meant to be a solo mission. You will practice better and progress more if you are working towards a polished performance. If your specific situation doesn’t lend itself to public performances then let YouTube be your stage! Post a link to YOUR performance video in the comments section below.
I start by giving you a very simple interpretation consistent with what I expect from a young learner. Then I branch in this video by giving you some options to take your performance to the next level. Whether that means a brisker tempo or adding some dynamic contrast, these are great ways to show your mastery of the piece. Whether you choose to perform the piece with these optional additions or not, I highly recommend you experiment with them. Remember that these pieces are meant to teach you. Now that you have the basics down, start testing your musical flexibility and cello mastery.
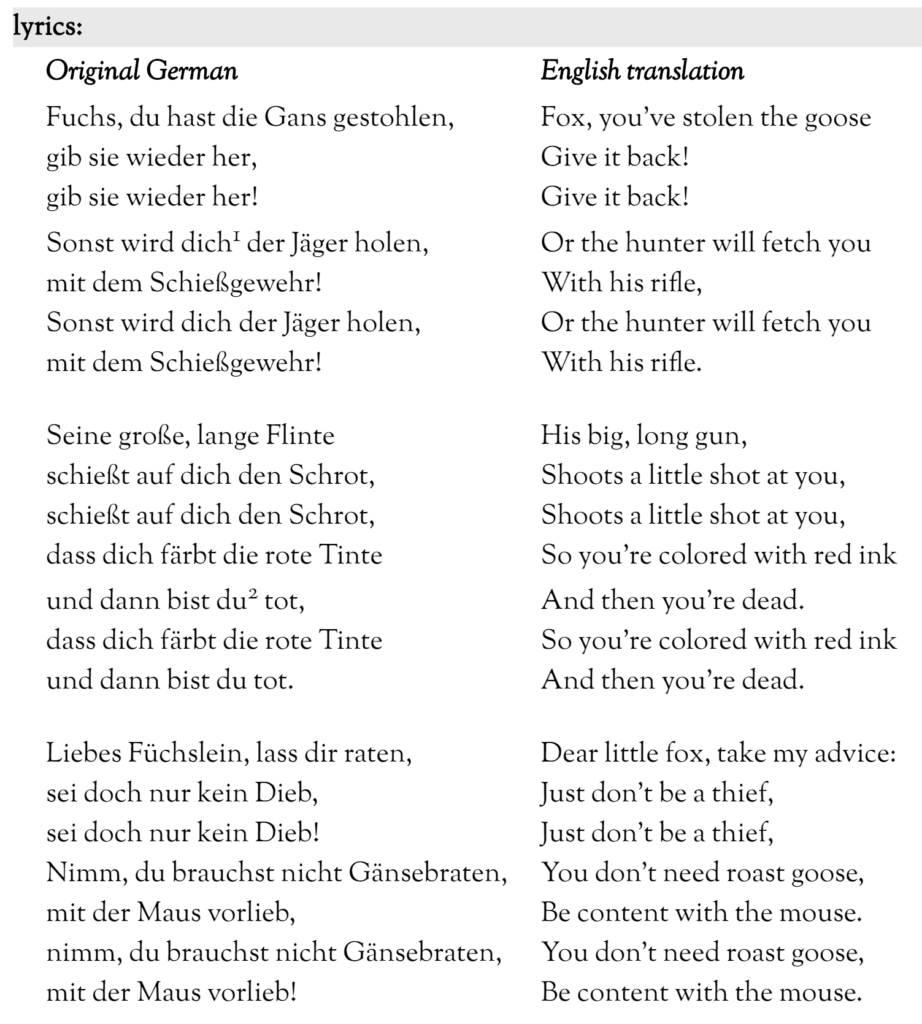
This German folk song dates back to the 1700’s and has lyrics written by Ernst Anschütz (1780–1861). I always think its fun to know the words behind the music you play. The German lyrics fit the music better with the “gib sie wieder her!” matching the repeated pivot finger. There is even a fun, cautionary tale to learn along the way!
Pro Tip
There is not one “right way” to play. You don’t need to sound just like my video or the Suzuki CD. Music is by its very nature an individualistic form of communication. No matter what you are playing, once you’ve got the basics down, start communicating and experimenting with the music!
As we learn to play Song of The Wind from Suzuki Book 1 for cello, let’s make sure that your posture is setting you up for success down the road. Here is a “handy” cello posture checklist:
- Posture – feet flat on the floor, cello between your knees, touching at your sternum, sitting straight up, shoulders relaxed, elbow out like a kickstand, straight EWP (elbow-wrist-pinkie)
- Left hand – thumb and fingers bent (making a “C”), fingers arched and contacting the string with the pad of the fingertip, thumb bent and under 2nd finger
- Bow path – bow travels straight across the string (t-bow), midway between the fingerboard and the bridge (forte-freeway)
- Bow hand – thumb slightly bent, index finger touching the stick between the first and second knuckle, hand pronated, fingers slightly apart — not overly spread or bunched together
- Keep fingers down as you play – as you ascend the string don’t lift the finger you just played when you place the new finger. As you descend place all 4 fingers and then peel off the fingers one by one.
- Check intonation – verify your intonation. Play with the video, use a tuner, watch your hand in a mirror to check that you are on the tapes. Don’t assume, verify.