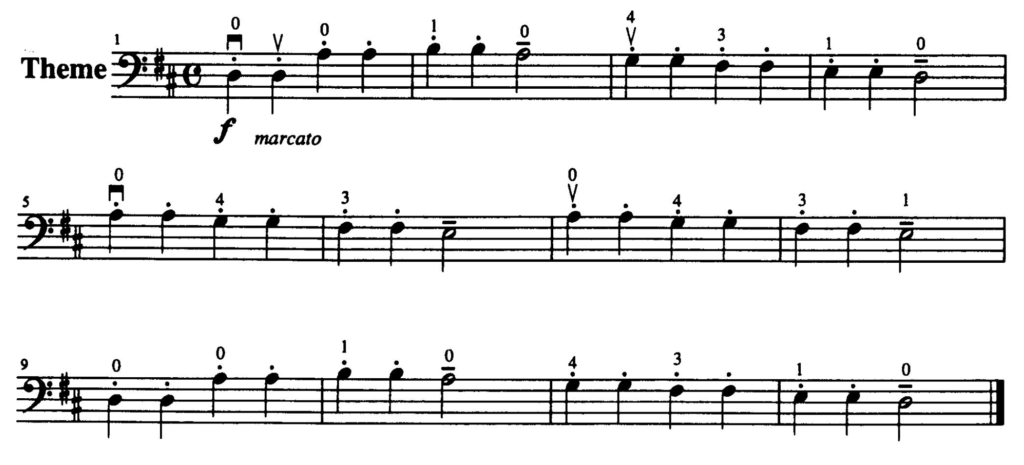
Twinkle Twinkle Little Star - THEME!
You should have already mastered the Twinkle fingering from previous lessons and by now you have played all the variations. If you have worked through the previous 7 videos then this main theme is usually more of a celebration than a test. It does require some longer bow strokes for the half-notes as well as good bow control on upbows. When playing the long half-notes simply slow down the bow speed so you travel along the string more slowly.
If you were to play the wrong note, you would most certainly stop and fix the error. What if you play a down bow where an up bow belongs? Would you stop and fix that error? All too often the answer is no. Even when students realize that they are backwards in their bowing they often refuse to stop. This is a test of your musical integrity. If you will stop and fix a bowing mistake, just as you would a more noticeable mistake, you will create reliable muscle memory. Bow direction matters — in some cases more than others — but it certainly matters. Being disciplined during this theme where there are some temptations to ignore mistakes will pay great dividends down the road.
Pro Tip
If you are struggling with this theme, go back to plucking the tune along with this video or the fingering video. Creating beautiful tone with the bow requires a lot of brain power where plucking allows you focus on fingering and rhythm only.
As we learn Twinkle Twinkle Little Star for cello, let’s make sure that your posture is setting you up for success down the road. Here is a handy posture checklist:
- Posture – feet flat on the floor, cello between your knees, touching at your sternum, sitting straight up, shoulders relaxed, elbow out like a kickstand, straight EWP (elbow-wrist-pinkie)
- Left hand – thumb and fingers bent (making a “C”), fingers arched and contacting the string with the pad of the fingertip, thumb bent and under 2nd finger
- Bow path – bow travels straight across the string (t-bow), midway between the fingerboard and the bridge (forte-freeway)
- Bow hand – thumb slightly bent, index finger touching the stick between the first and second knuckle, hand pronated, fingers slightly apart — not overly spread or bunched together
- Keep fingers down as you play – as you ascend the string don’t lift the finger you just played when you place the new finger. As you descend place all 4 fingers and then peel off the fingers one by one.
- Check intonation – verify your intonation. Play with the video, use a tuner, watch your hand in a mirror to check that you are on the tapes. Don’t assume, verify.