First step? Find a wall.
The first step to a professional vibrato is to put the cello down and find a wall! Anchoring the elbow will help to isolate the motion to the correct joints. There are of course other methods of creating a beautiful vibrato so please do not attempt to correct your teacher, but the shoulder/arm method is time-tested as a fantastic way to develop a variable, relaxed, tension-free vibrato!
Be sure to center the rotation of the arm so that you rock back and expose the tricep as much as you rock forward. Start with a motion that rocks back to behind the ear and forward to below the nose. The center of the motion is the spot where you would find first position on the cello. Some students find it helpful to shake a cylinder next to their ear. To try this learning tool, tape off one side of an empty toilet paper roll and add a small amount of rice or dried corn, then tape off the other side to make a cylindrical rattle. Shake the rattle next to the ear with the elbow against the wall. If you are making the correct motion then movement originates in the back, the shoulder rotates in the socket, and the shoulder blade rocks back and forth.
Pro Tip
The longer you spend practicing this motion away from the instrument, the quicker you will acquire the desired skill. The more secure you are in the motion away from the instrument the more easily you can add the complications of pitch, speed, and bowstroke.
Isolating the elbow against a point that it can rock against really helps encourage the correct motion. Those of you practicing with a parent, have the parent use their hand as a substitute wall once you have returned to the cello. Those practicing on their own may want to situate their chair close enough to a wall to anchor the elbow as an intermediate step. Just watch out not to hit your bow against the wall.
Checklist:
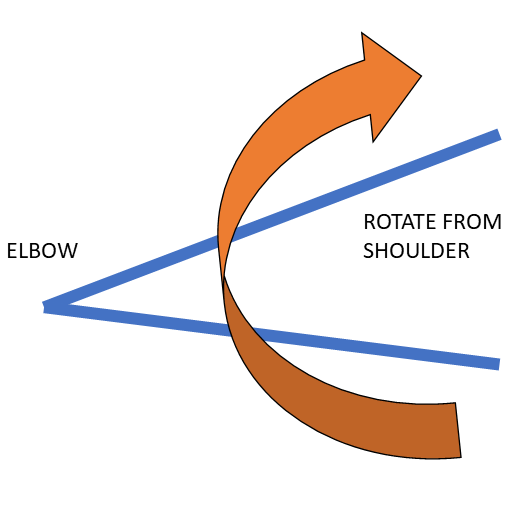
- Elbow stays put — don’t let the elbow slide up or down as the rotation occurs
- Rotation is centered — rock back to behind your ear as much as you rock forward to below your nose
- Straight EWP — keep a straight line from the tip of your elbow to the pinkie knuckle (Elbow – Wrist – Pinkie)
- Use the back not the wrist — your wrist should not twist or rotate, it acts only as an extension of the forearm. Originate the motion using back muscles (lats).
- Reach around and feel your shoulder blade. If you are doing the motion correctly it will rock forward and back. Also rest your hand over your the top of the shoulder so you can feel the bone rotate in the socket.