You don't hold anything in this world the same way you hold a cello bow!
Why is it so hard to hold a bow properly? Why does it take nearly every student weeks just to figure out how to hold a stick that weighs around 80 grams? Because you don’t hold anything else in this world the same way you hold a cello bow! Think about the first time you went skiing, ice skating, or horseback riding. How did your muscles feel the next day? You were likely sore in places you’d never been sore before. That’s because you were using muscles you had never used before, or at least not in that way. The same phenomenon is true when it comes to holding the bow! You have to train your muscles to be used in a way that they have never been used before. That takes practice.
Holding the bow properly is new and unfamiliar so your hand will keep wanting to revert to some other more familiar way of grasping the stick. It will collapse. That’s okay! The whole point of this exercise is to teach you how to rebuild your bow hold so that when it does collapse you can quickly rebuild it. If you are diligent and picky then over time your muscles will adapt to the new task and you will have a magnificently versatile hand position that can pull amazing sounds out of your instrument.
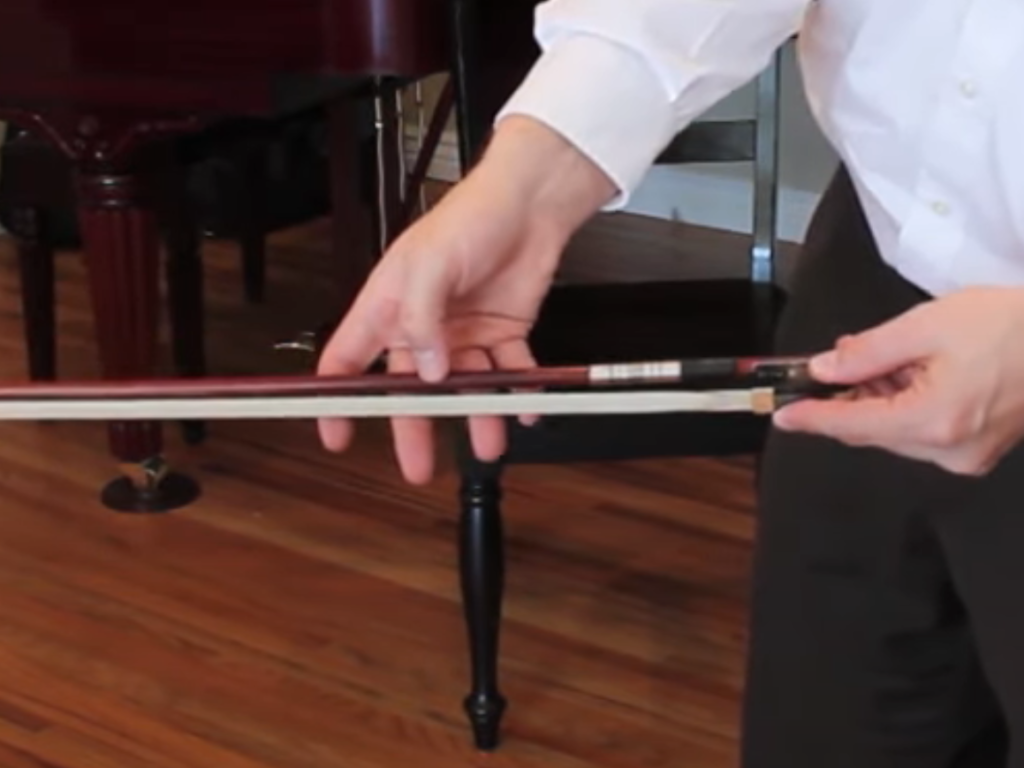
You start by building the bow hold away from the cello as shown in the video. As soon as you start to play on the string expect your hand to collapse. Rebuild your bow hand paying close attention to your thumb as many times as it takes. Each time your hand collapses simply rebuild the hold. Don’t beat yourself up and don’t stop caring about the shape. Soon you will be able to play open strings and keep a perfect bow hold. Perhaps attempt Schroeder Exercise No. 1. Don’t be surprised if as soon as you start using your left hand the bow hand to collapses again. Patiently go through the same process. This is where a private teacher really makes a difference. The teacher can keep an eye on the bow hand, posture, left hand, and musical demands all at the same time because the teacher knows what each individual element is supposed to look like. The task is much more difficult on your own.
Pro Tip
Practice building the bow hold away from the cello. Because you know how to build the technique independent from other elements, when your bow hand collapses (which is part of learning) you can easily rebuild the hand!
These beginning videos are single-subject in an attempt to help you to acquire technique one building block at a time. This takes discipline and while it seems like the slow path to playing, it is in fact the quickest possible path to good playing. Once you feel secure in your bow hold then test your strength with the windshield wiper and toe-touches exercises found in the video. STAY LOW — just like in the video. You want to build muscle down where you play the instrument. Doing windshield wiper exercises up by your nose is for violinists. Stay hip-height and practice rotating at the shoulder using your lats. It helps my younger students to do a little chicken-dance to isolate those back lat muscles. Windshield wiper and toe-touch exercises should use back muscles with the arm rotating in the shoulder socket. If you can reliably do the exercises without your thumb collapsing or losing the shape of your hand then you are ready to use the bow on open strings. I recommend Schroeder No. 1 which is all open strings as a good place to start. Soon you’ll be using your left hand and right hand together. At each new step, expect the hand to collapse or fail in some way. Don’t fret — just rebuild the hand using the technique taught here. In no time, you’ll have a stable, strong, supple bow hold that can do some amazing things down the road!
HAPPY PRACTICING CELLISTS!