Lightly Rowing To Cello Mastery!
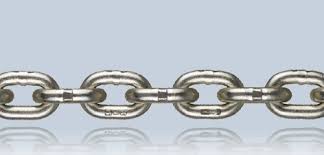
Divide and conquer! I break up Lightly Row so each line gets the attention it needs. I make it SO EASY to do your daily practice, just do the repetitions with the video and you will have the rhythms, notes, everything in your ear and hands. I use what I call the Chain Method — think of every phrase as a link in a chain. Take the time to forge each link individually and then connect them to each other.
These practice videos are meant to be hands on — like a yoga or exercise video. Get your cello between your legs and let me practice with you at home. It’s a great way to make sure you are doing small chunks with the right elements all in place from the start. Think of me as a practice coach talking you through your practice. Whether you are using these videos in place of a private teacher or to augment weekly lessons, practicing with a pro is sure to help avoid some of the common mistakes. Take the time to forge each link of the chain with me and then we assemble them together!
Pro Tip
BE EFFICIENT! It burns as many calories to lift a finger as it does to put a finger down. The most natural thing in the world is lifting up that 3rd finger to play open A but if you can train yourself to be efficient then your playing will be more in tune, faster, and more reliable! KEEP FINGERS DOWN!
As we learn to read music, let’s make sure that your posture is setting you up for success down the road. Here is a handy posture checklist:
- Posture – feet flat on the floor, cello between your knees, touching at your sternum, sitting straight up, shoulders relaxed, elbow out like a kickstand, straight EWP (elbow-wrist-pinkie)
- Left hand – thumb and fingers bent (making a “C”), fingers arched and contacting the string with the pad of the fingertip, thumb bent and under 2nd finger
- Bow path – bow travels straight across the string (t-bow), midway between the fingerboard and the bridge (forte-freeway)
- Bow hand – thumb slightly bent, index finger touching the stick between the first and second knuckle, hand pronated, fingers slightly apart — not overly spread or bunched together
- Keep fingers down as you play – as you ascend the string don’t lift the finger you just played when you place the new finger. As you descend place all 4 fingers and then peel off the fingers one by one.
- Check intonation – verify your intonation. Play with the video, use a tuner, watch your hand in a mirror to check that you are on the tapes. Don’t assume, verify.